For my final project in the Physical Computing course I took during my Sophomore Year, I decided to create a cardboard replica of a record player with some moving parts.
Demo Video

Project Description
After being given the parameters for my final project, I began to think about different ideas for what I wanted to make. At the time, I was really into getting vinyl records, so I thought it would be a fun idea to make a cardboard replica of a record player.
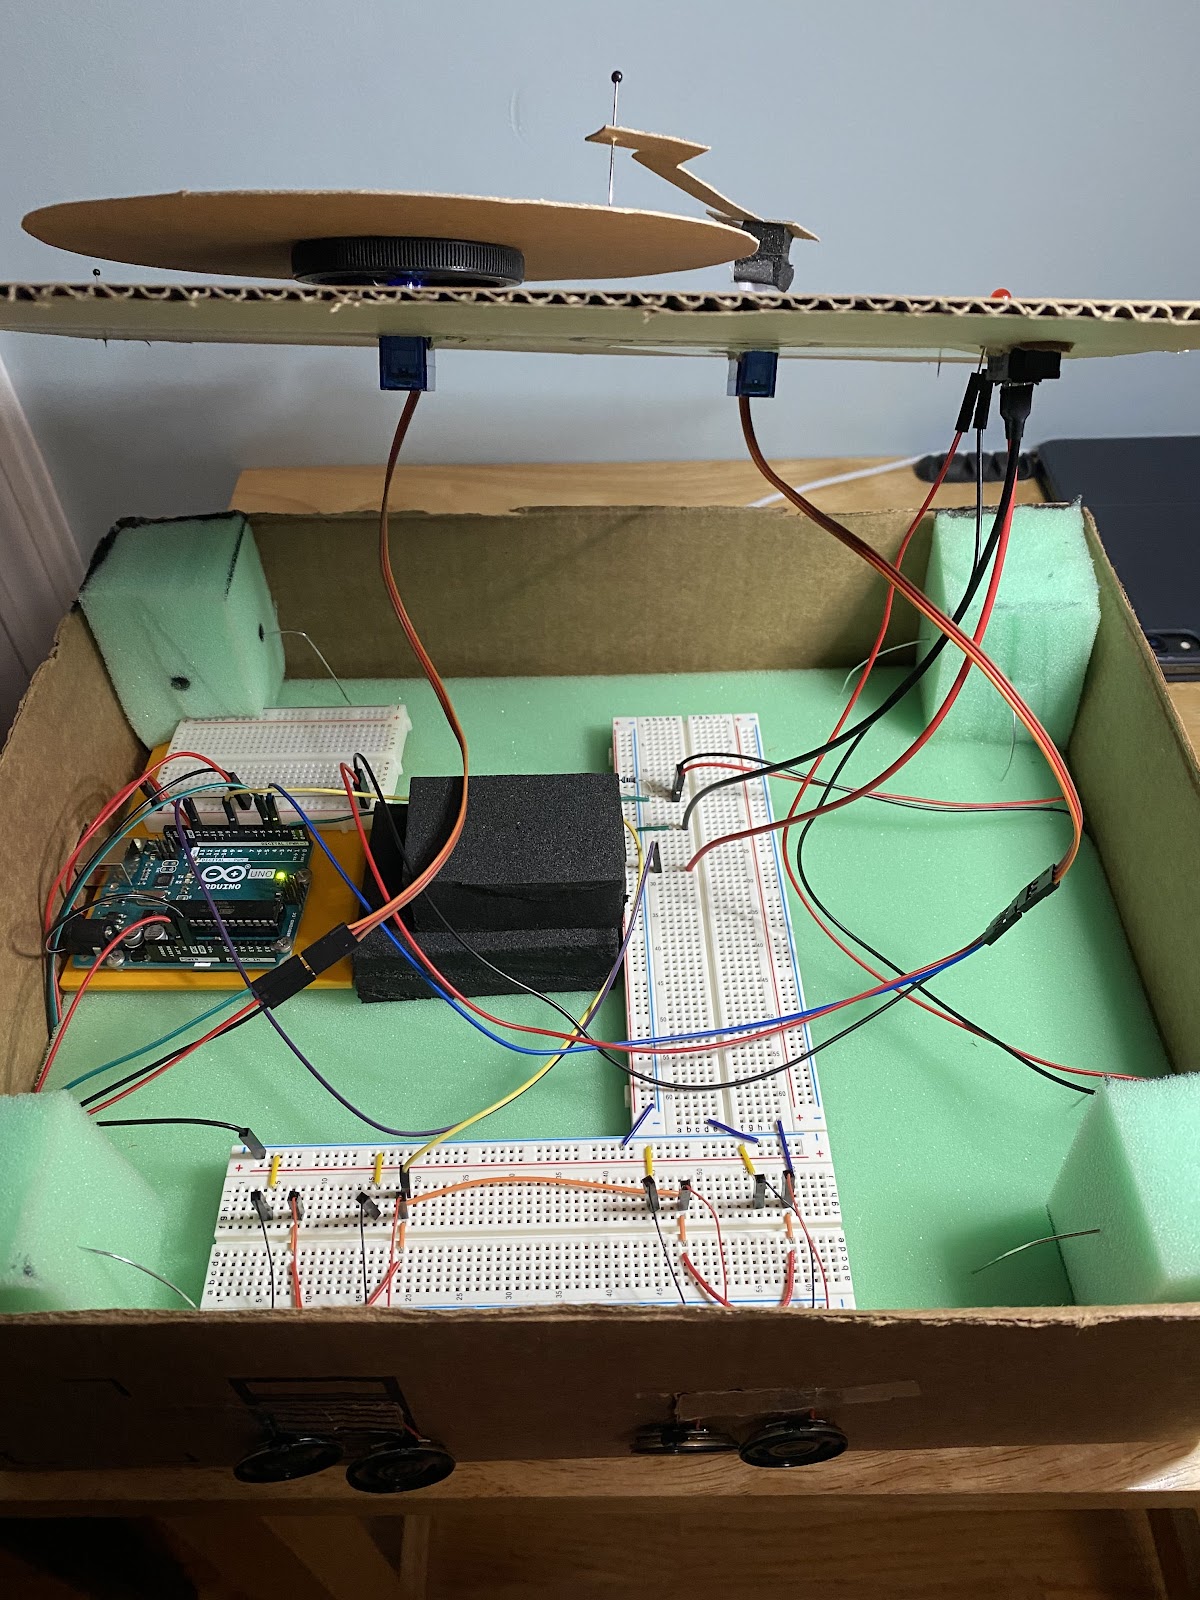
In order to make the mechanical parts of the replica record player, I used my Arduino Uno board, along with three breadboards. I previously used the Arduino Uno throughout the semester on other projects I made. I also used four tiny speakers, a red LED light, a switch, and two servo motors. Through Arduino’s coding application, I was able to make the speakers play different tones as the servo motors would spin the “record” and move the needle. The red LED light would turn on as well to signify that the record player was on.
As for the design of the cardboard box, I made two hinged slots on the front side to be able to let the speakers hang out. On the inside of the box, I filled the bottom of it with a layer of foam. In each of the corners and in the center of the box, I placed foam blocks to support the top layer of cardboard. I secured the foam corner blocks with unbent paper clips. With the top layer of the box, I had cut out holes to stick the servo motors, switch, and LED light through. To secure the top layer of the box, I used push pins stuck into each corner foam block below. To make the record and tonearm, I just cut pieces of cardboard to match the shapes and a pushpin to represent the needle.
Overall, this project was the culmination of all that I learned during the Physical Computing course and I feel that it turned out great.
